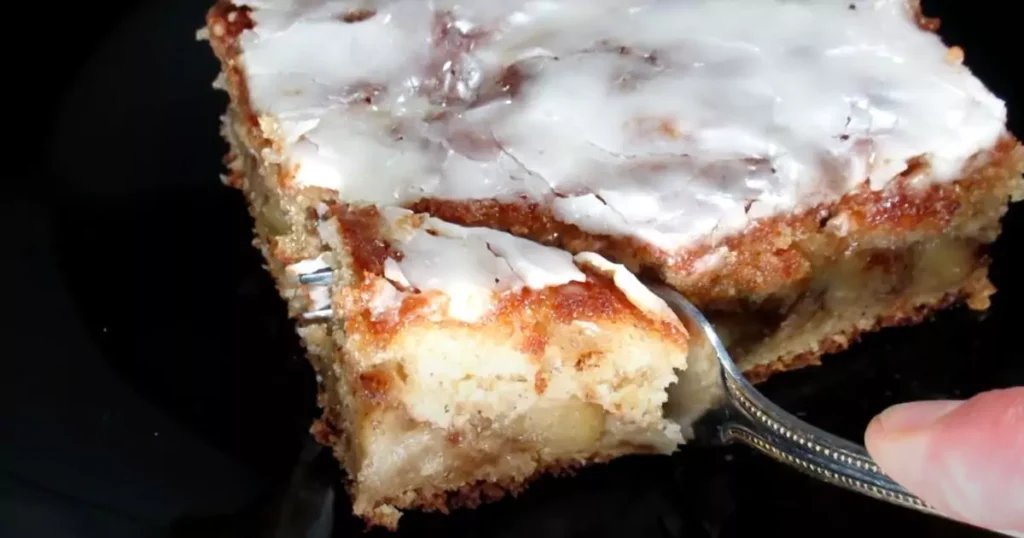
Few things are more delightful than the aroma of freshly baked cinnamon rolls wafting through the kitchen. These sweet, soft, and gooey treats are perfect for breakfast, brunch, or dessert. Making cinnamon rolls from scratch might seem daunting, but with the right recipe and a little patience, you can create bakery-quality rolls at home. In this blog, we’ll guide you through a detailed recipe, storage tips, creative add-ons, and health considerations. Plus, we’ll highlight the benefits of having health, family, and home insurance to ensure you’re prepared for any unexpected mishaps in the kitchen.
Storage Ideas
Proper storage is essential to keep your homemade cinnamon rolls fresh and delicious. Here are some tips:
- Room Temperature: Store your cinnamon rolls in an airtight container at room temperature for up to 2 days.
- Refrigeration: For longer storage, refrigerate the rolls in an airtight container. They can last for up to a week.
- Freezing: Freeze the rolls in an airtight container or wrap them individually in plastic wrap and then in aluminum foil. They can be stored in the freezer for up to 3 months. Thaw in the refrigerator overnight and warm in the oven before serving.
Ingredients
To make the perfect cinnamon rolls, you will need the following ingredients:
Dough:
- 1 cup warm milk (110°F or 45°C)
- 2 1/4 teaspoons active dry yeast
- 1/2 cup granulated sugar
- 1/3 cup unsalted butter, melted
- 2 large eggs
- 4 cups all-purpose flour
- 1 teaspoon salt
Filling:
- 1/2 cup unsalted butter, softened
- 1 cup brown sugar, packed
- 2 tablespoons ground cinnamon
Frosting:
- 4 ounces cream cheese, softened
- 1/4 cup unsalted butter, softened
- 1 1/2 cups powdered sugar
- 1/2 teaspoon vanilla extract
Instructions
Step 1: Activate the Yeast
In a small bowl, combine the warm milk and active dry yeast. Let it sit for about 5-10 minutes until it becomes frothy. This step is crucial as it activates the yeast, ensuring your dough will rise properly.
Step 2: Prepare the Dough
In a large mixing bowl, combine the sugar, melted butter, and eggs. Mix well until smooth. Add the activated yeast mixture and stir to combine. Gradually add the flour and salt, mixing until a dough forms. The dough should be soft but not sticky. If it’s too sticky, add a little more flour, one tablespoon at a time.
Step 3: Knead the Dough
Turn the dough out onto a floured surface and knead it for about 5-7 minutes, or until it becomes smooth and elastic. Kneading develops the gluten in the flour, which gives the cinnamon rolls their light and fluffy texture.
Step 4: Let the Dough Rise
Place the dough in a lightly greased bowl, cover it with a clean kitchen towel, and let it rise in a warm, draft-free area for about 1-2 hours, or until it has doubled in size. This rising time allows the dough to develop its flavor and texture.
Step 5: Prepare the Filling
While the dough is rising, prepare the filling by mixing the softened butter, brown sugar, and ground cinnamon in a small bowl. This mixture should have a spreadable consistency.
Step 6: Roll Out the Dough
Once the dough has risen, punch it down to release the air and turn it out onto a floured surface. Roll the dough into a large rectangle, about 1/4-inch thick. Spread the cinnamon-sugar filling evenly over the dough, leaving a small border around the edges.
Step 7: Roll and Cut
Starting from one of the long edges, tightly roll the dough into a log. Cut the log into 12-15 even slices using a sharp knife or dental floss. Place the rolls in a greased baking dish, leaving some space between each roll to allow for rising.
Step 8: Final Rise
Cover the baking dish with a clean kitchen towel and let the rolls rise for another 30-45 minutes, or until they have doubled in size. This second rise ensures the rolls will be light and fluffy.
Step 9: Bake
Preheat your oven to 350°F (175°C). Bake the rolls for 20-25 minutes, or until they are golden brown and cooked through. Be careful not to overbake them, as they should remain soft and tender.
Step 10: Prepare the Frosting
While the rolls are baking, prepare the frosting by combining the softened cream cheese, butter, powdered sugar, and vanilla extract in a mixing bowl. Beat until smooth and creamy.
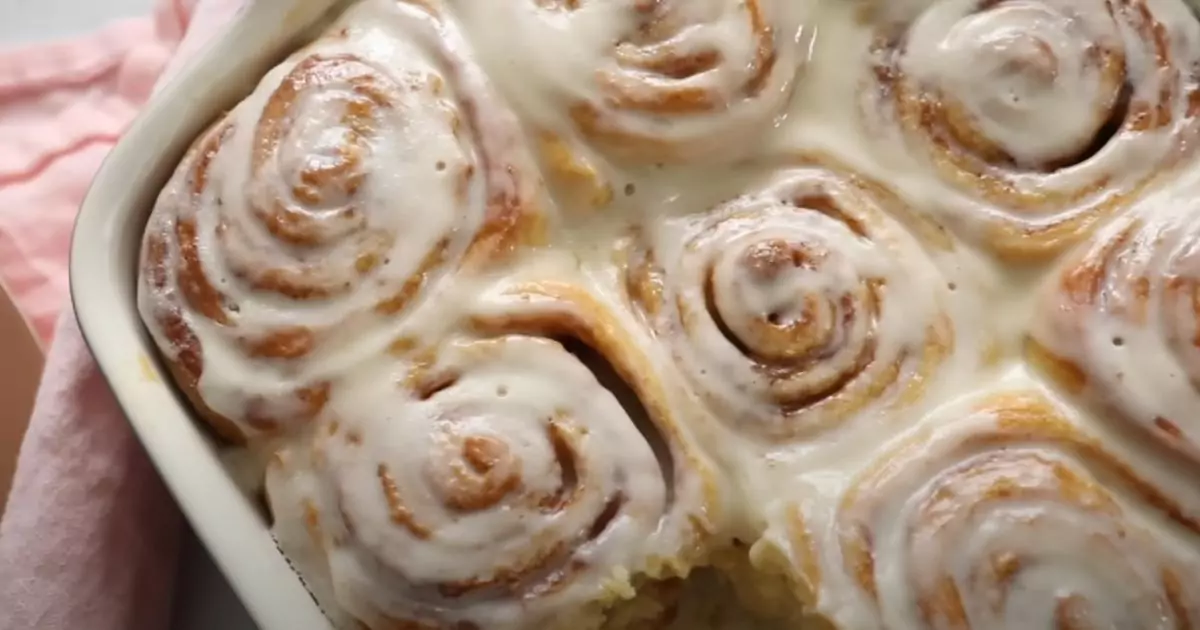
Step 11: Frost and Serve
Once the rolls are out of the oven, let them cool slightly before spreading the frosting generously over the top. Serve warm and enjoy the gooey, sweet delight of homemade cinnamon rolls.
Add-On Suggestions
To make your cinnamon rolls even more delicious, consider these creative add-ons:
- Nuts: Add chopped pecans or walnuts to the filling for a crunchy texture.
- Raisins: Sprinkle raisins or other dried fruits over the filling for a sweet, chewy addition.
- Spices: Add a pinch of nutmeg or cardamom to the filling for extra warmth and depth of flavor.
- Glaze: Drizzle a simple glaze made of powdered sugar and milk over the rolls instead of cream cheese frosting for a lighter option.
- Caramel Sauce: Top the rolls with homemade or store-bought caramel sauce for an indulgent treat.
Health Considerations
While cinnamon rolls are a delicious indulgence, it’s important to enjoy them in moderation. Here are some health considerations to keep in mind:
- Calories and Sugar: Cinnamon rolls are high in calories and sugar, which can contribute to weight gain and other health issues if consumed in excess. Consider enjoying them as an occasional treat rather than a daily snack.
- Portion Control: Make smaller rolls or limit yourself to one roll per serving to help control portion sizes.
- Ingredient Substitutions: Use whole wheat flour for added fiber, and consider reducing the amount of sugar or using natural sweeteners like honey or maple syrup.
Benefits of Health, Family, and Home Insurance
While baking at home is a fun and rewarding activity, it’s always good to be prepared for any unexpected incidents. Here’s why having comprehensive health, family, and home insurance is beneficial:
- Health Insurance: Covers medical expenses in case of kitchen accidents such as burns or cuts, ensuring you get the necessary treatment without financial burden.
- Family Insurance: Protects all members of your household, providing peace of mind that everyone is covered in case of emergencies.
- Home Insurance: Safeguards your home against damage or loss due to kitchen fires or other accidents, helping cover repair costs and protect your investment.
Having these insurance policies in place allows you to enjoy your baking adventures with confidence, knowing you’re protected against unexpected events.
Making homemade cinnamon rolls is a rewarding experience that fills your home with warmth and delicious aromas. With this detailed recipe, you can create soft, gooey, and perfectly spiced cinnamon rolls that will impress your family and friends. Remember to store them properly, get creative with add-ons, and consider health aspects for a balanced approach. By being prepared with health, family, and home insurance, you can enjoy your baking endeavors with peace of mind. So, gather your ingredients, follow these steps, and indulge in the delightful taste of homemade cinnamon rolls. Happy baking!