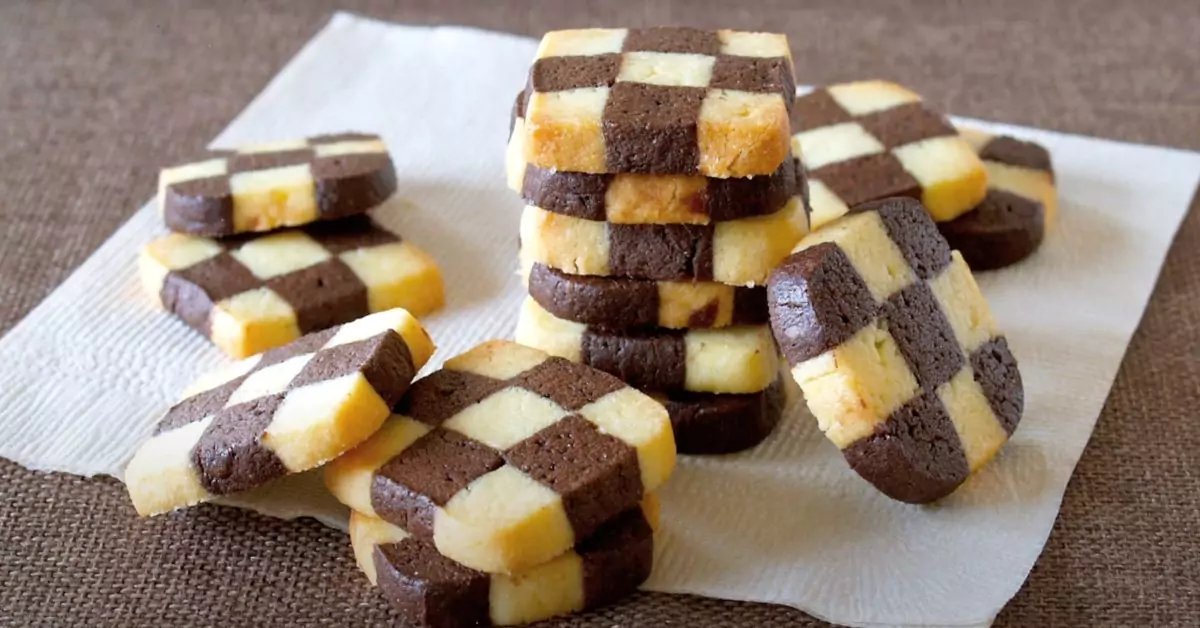
Checkerboard Cookies are a unique and eye-catching type of cookie known for their distinctive pattern that resembles a checkerboard. These cookies are a wonderful blend of two flavors – typically vanilla and chocolate – and are as delicious as they are visually appealing.
The process of making these cookies is a bit of an art and requires a bit of patience, but it’s also a fun and rewarding experience. To start, you’ll need to make two separate batches of dough: one vanilla (plain) and the other chocolate-flavored. This involves creaming butter and sugar, adding eggs and flavorings, and then mixing in flour (with cocoa added for the chocolate dough).
After the dough is prepared, it’s shaped into rectangular blocks and chilled. This is an important step as it makes the dough easier to handle and helps maintain the shape of the cookies. Once chilled, the dough is then sliced into strips and the strips are alternated and stacked to form a new block with the checkerboard pattern. This pattern is what gives these cookies their name and delightful appearance.
These cookies are perfect for special occasions, holidays, or as a unique treat for cookie lovers. They’re also great for gifting, as their impressive look and delicious taste are sure to please anyone who receives them.
Checkerboard Cookies Will Look Great On Your Holiday Cookie Tray!
Checkerboard Cookies are a fantastic addition to any holiday cookie tray and they are sure to catch everyone’s eye with their beautiful and unique design. These cookies are not only visually appealing but also delicious and fun to make. The best part? They are much simpler to create than you might think!
The process of making Checkerboard Cookies is straightforward and enjoyable, making it a perfect baking activity to involve kids in. The recipe starts with making two types of dough, typically one vanilla and one chocolate. These doughs are then formed into blocks, chilled, and sliced into strips. The strips are alternated and stacked to form the checkerboard pattern.
One of the great things about this recipe is that it’s essentially a slice-and-bake type, meaning you can prepare the dough in advance and simply slice and bake the cookies when you’re ready. This approach is not only convenient but also foolproof if you follow the step-by-step process.
When it comes to baking these cookies, patience and attention to detail in assembling the dough are key, but the process is not overly complicated or time-consuming. The result is a batch of festive, fun, and pretty cookies that are perfect for any holiday occasion.
Checkerboard Cookies can be a delightful project for a family baking day, offering a chance for everyone to get involved and enjoy the process of creating something beautiful and tasty together.
Remember, the joy of baking these cookies lies as much in the process of making them as in the delightful end result. So, gather your ingredients, invite your family into the kitchen, and enjoy creating these beautiful cookies that are sure to become a holiday favorite!
How To Make Checkerboard Cookies
Making Checkerboard Cookies is a fun and creative baking project that’s easier than it looks. Here’s a simplified breakdown of how you can make these delightful cookies:
- Prepare the Dough: Start by making a single dough, which is a clever aspect of this recipe. Once your vanilla dough is ready, you divide it in half. Keep one half as vanilla, and for the other half, add cocoa powder to make it chocolate flavored. Mixing until the cocoa is well incorporated is key.
- Shape the Dough: With your hands, shape both the vanilla and chocolate dough into square logs. Aim for each log to be about 2 inches in diameter and 6 inches in length. It’s crucial to chill the dough for at least 30 minutes; this makes it easier to slice later. Ensure both logs are the same size for uniformity.
- Slice and Arrange the Dough: Once chilled, slice each dough log into 9 equal strips. This is done by first cutting each log into three long strips, then rotating the dough and slicing again to make 9 strips in total. Arrange these strips in a checkerboard pattern by alternating the vanilla and chocolate strips in a 3×3 grid.
- Assemble the Cookies: Press the logs together firmly, ensuring there are no gaps between the strips while maintaining the square shape. This step is crucial for the checkerboard pattern to hold when sliced.
- Chill Again and Bake: After assembling, chill the logs again to firm them up, making slicing into individual cookies easier. Once chilled, slice the logs into cookies and they’re ready to bake.
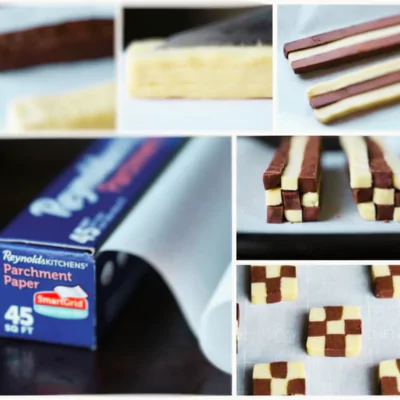
Regarding the use of parchment paper, it’s a great tool for cookie baking for several reasons:
- Ease of Use: Parchment paper can be easily cut to fit any size pan, which is helpful for baking.
- Even Baking and Spacing: The gridlines on some parchment papers help in evenly spacing out the cookies, ensuring they bake uniformly.
- Non-Stick and Easy Clean-Up: Parchment paper prevents cookies from sticking to the pan and makes clean-up a breeze. Plus, some types are reusable and compostable.
As for tearing parchment paper smoothly, a useful tip is to measure the amount you need, tuck the box’s flap inside to hold the paper in place, and then tear it along the serrated edge of the box at an angle. This method usually results in a clean, straight tear.
Storing Tips
Storing cookies properly is important to keep them fresh and tasty. Here are some easy tips for storing cookies:
- Room Temperature: Most cookies can be stored at room temperature. Keep them in an airtight container to maintain their freshness. This method works well for up to a week.
- Separate Different Types: If you have different types of cookies, store them in separate containers. Different cookies can have different moisture levels, and storing them together might affect their texture.
- Use Parchment Paper Layers: If you’re stacking cookies in a container, place a sheet of parchment paper between each layer. This prevents them from sticking together and keeps the layers neat.
- Cool Completely Before Storing: Always let cookies cool completely before storing them. Warm cookies can create condensation in the container, which can make them soggy.
- Refrigerating Cookie Dough: If you have cookie dough that you’re not ready to bake yet, you can store it in the refrigerator. Wrap the dough tightly in plastic wrap, and it should be good for a few days.
- Freezing Cookies: For longer storage, you can freeze cookies. After they cool down, place them in a freezer-safe container or bag. They can last in the freezer for several months. Thaw them at room temperature when you’re ready to eat them.
- Freezing Cookie Dough: You can also freeze cookie dough. Wrap it well in plastic wrap and then place it in a freezer bag. When you’re ready to bake, thaw the dough in the refrigerator overnight, then let it come to room temperature before baking.
- Reviving Cookies: If cookies have become a bit stale, you can often revive them. Placing them in the oven for a few minutes can help them regain their crispness.
Checkerboard Cookies Recipe In Detail:
Making checkerboard cookies is a delightful and creative baking experience. Here’s a simplified guide to help you make these charming cookies:
- Preparation Time: It takes about 20 minutes to prepare the dough for these cookies.
- Cooking Time: The baking time is relatively short, about 10 minutes.
- Total Time: Overall, you’ll spend about 30 minutes actively working on the cookies, plus additional time for chilling the dough.
- Yield: This recipe should yield about 24 cookies.
Ingredients:
- Butter: Use room temperature butter, typically about 1 cup. Room temperature butter is easier to cream with sugar, which is vital for a smooth dough.
- Granulated Sugar: This sweetens the cookies. About 1 cup is usually sufficient for a balanced sweetness.
- Eggs: You’ll need 1 whole egg and 1 additional egg yolk. Eggs provide structure and richness to the dough.
- Vanilla Extract: Approximately 1 teaspoon, this adds flavor to the vanilla portion of the dough.
- Baking Powder: About 1 and a half teaspoons, which acts as a leavening agent, helping the cookies rise slightly during baking.
- Kosher Salt: A half teaspoon of salt enhances the flavors of the other ingredients.
- All-Purpose Flour: The main dry ingredient, you’ll need about 3 cups. Flour gives the cookie its structure.
- Unsweetened Cocoa Powder: A third of a cup is used to flavor and color half of the dough to create the chocolate part of the checkerboard pattern.
Instructions:
- Mixing the Dough: Begin by creaming together the butter and sugar. Then, add in the egg, egg yolk, vanilla extract, baking powder, and salt, mixing until smooth. Gradually add the flour.
- Dividing the Dough: Once your dough is ready, divide it into two equal parts. Keep one part as is (this will be your vanilla dough) and add cocoa powder to the other half to make chocolate dough.
- Shaping and Chilling: Shape both types of dough into logs, wrap them, and chill in the refrigerator. This firmness is crucial for slicing.
- Forming the Checkerboard Pattern: After chilling, cut the dough into strips and arrange them in an alternating pattern of vanilla and chocolate to create a checkerboard effect. Chill again before baking.
- Baking: Preheat your oven and line a baking sheet with parchment paper. Slice the chilled dough into pieces and bake.
- Storing the Cookies: After baking, store the cookies in an airtight container. They can stay fresh for up to 5 days at room temperature. You can also freeze them for longer storage.
Nutrition per Cookie:
Each cookie contains approximately 167 calories and has a balance of carbohydrates, fats, and protein.
This recipe provides a fun way to create a visually appealing and tasty treat. The checkerboard pattern is achieved through a simple yet effective method of alternating dough colors and chilling adequately before baking. Remember, the key to perfect checkerboard cookies lies in the precision of cutting and arranging the dough, as well as maintaining a consistent temperature throughout the baking process. Enjoy your baking adventure!